在 Mac 上 Apache 部署 Vue 網站
基本上 Mac 作業系統裡面已經有內建的 Apache,所以本篇文章就不提如何安裝 Apache 的伺服器。在使用 Apache 的時候需要有 root 的權限,請先輸入以下的指令。
ps. Apache 伺服器版本為:Apache/2.4.23 (Unix)
1 | $ sudo su - |
接著再輸入 Apache 的啟動指令
1 | $ apachectl start |
這時候會看到服務已經載入啟動
1 | <Username>:~ root# apachectl start |
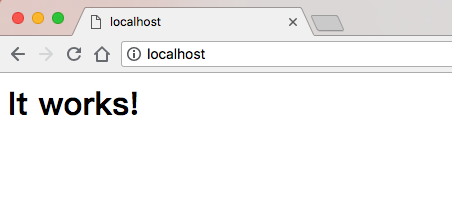
然後看一下 http://localhost/ 有沒有出現 It works! 字眼,就代表 Apache 有正常運行,而這個網頁目錄是放在 /Library/WebServer/Documents
Apache 參數設定
修改 httpd.conf
輸入完畢之後,在 /etc/apache2/httpd.conf 把以下的項目的註解 # 移除
1 | LoadModule authz_core_module libexec/apache2/mod_authz_core.so |
修改 httpd-userdir.conf
在 httpd 編輯完畢之後,再修改 /etc/apache2/extra/httpd-userdir.conf 檔案,將以下的項目的註解 # 移除
1 | Include /private/etc/apache2/users/*.conf |
這樣子,都編輯完畢再將 Apache 重啟。這時候進入 http://localhost/ 就會得到以下畫面。
如果出現 You don t have permission to access / on this server 也就代表訪問的位置是沒有權限的。可以將資料夾調整一下權限,(如果網站放在 /Projects/demo)
1 | $ sudo chmod -R 777 /Users/<Username>/Projects/demo |
Vue 網站的修訂
修改 config/index.js
找到 build 內的 assetsPublicPath 參數,原本預設值是 /,而這個路徑對靜態的資源文件是絕對路徑。
1 | build: { |
改成相對路徑的寫法,將 assetsPublicPath 參數改為 ./
1 | build: { |
修改 build/utils.js
接著進入 build/utils.js 改 css 位置的路徑 publicPath
1 | if (options.extract) { |
修訂 index.pug
找到網站根目錄的 index.pug 檔案,修改 /static/favicon.ico 為 ./static/favicon.ico
1 | link(rel='shortcut icon', type='image/png', href='./static/favicon.ico') |
修訂 vue-router
由於我們希望網址是 http://localhost/demo/ ,要在 route 配置裡面加上 base 參數。
1 | export default new VueRouter({ |
部署到伺服器
一切都就緒之後,進入到根目錄下執行
1 | $ npm run build |
build 出來網站會產生一個打包好的 dist 的資料夾,這時在 Apache 的網站空間內,做一個 link 指向這個位置
1 | $ sudo ln -s /Users/<Username>/Projects/demo /Library/WebServer/Documents/demo |
ps. 記得後面的 /demo 不要多一個斜線 /demo/ 不然會找不到。
這樣就完成大部分的設置了。
新增 .htaccess 檔案
但是,又為什麼設置完畢之後,網站卻又一片空白?也是因為 Vue 的 history 模式概念,不會自動地發起 http 請求,解決方法將所有的請求進行轉發到 http://localhost/demo/index.html
可以在網站目錄夾裡面新增 .htaccess 檔案,內容輸入以下
1 | <IfModule mod_rewrite.c> |
這樣就能用 http://localhost/demo/ 來訪問網站了。